- Installation
- Program interface
- Splitting
- TV broadcast (Live stream), file record and motion detection
- Background editor
- Picture in picture (PiP) modes
- Screenshots creating
- Banner control
- Command Promt
Installation
Notes
1.The program KVYcamBgr is not compatible with my previous program KVYcam. The project KVYcam is stopped and not currently maintained anymore. If KVYcam is set on your PC, please remove it before KVYcamBgr installation.
2. For MS Windows 7 you should set SP1 and KB3033929 for full compatibility of your OS with new signing on SHA256. Usually these updates must be set automatically on your OS.
3. Information for owners of old MS Windows 7, 8.*: after KVYcamBgr installation, you must install the MS runtime update. Otherwise, you get the error “api-ms-win-crt-runtime-l1-1-0.dll is missing”.
Get the last copy of KVYcamBgr using this link. After downloading extract a zip file and run the installation file SetupKVYcamBgr*.exe and follow its instructions.
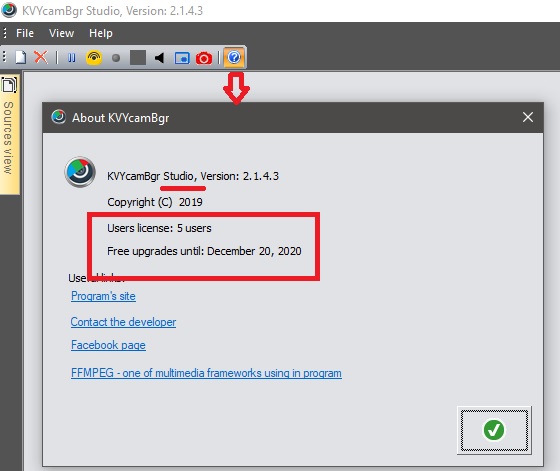
For the Studio version you should also purchase and install one of these users licenses. You can find the information about setted license by run KVYcamBgr and open the window About:
Program interface
Click KVYcamBgr icon on your desktop. The screen you’ll see after the first start:
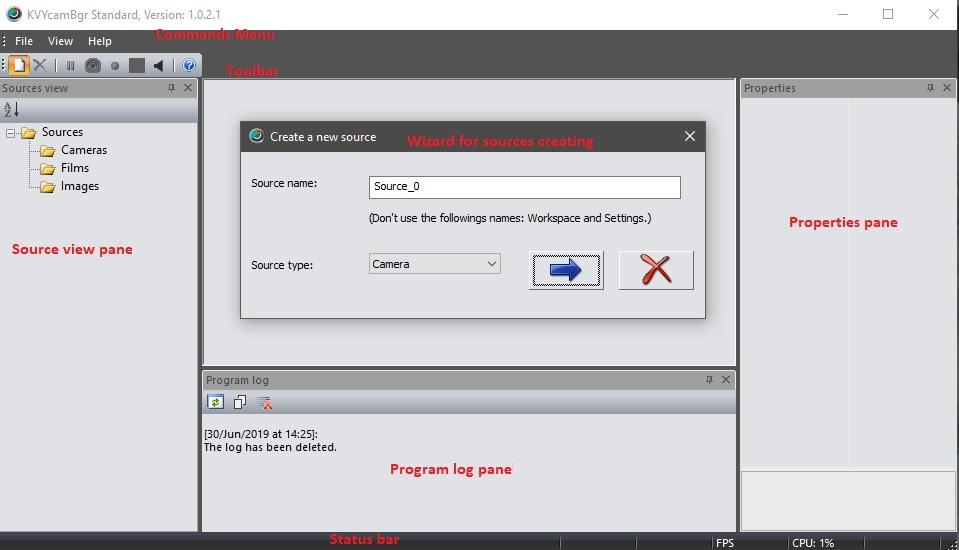
There is no video source created at this moment so the program invites you to create a new one by using the source creation wizard. Enter a source name and select its type (camera, film, image, desktop and IP camera) and then follow the wizard’s instructions. Tool tips are available for all control elements of the wizard’s windows.
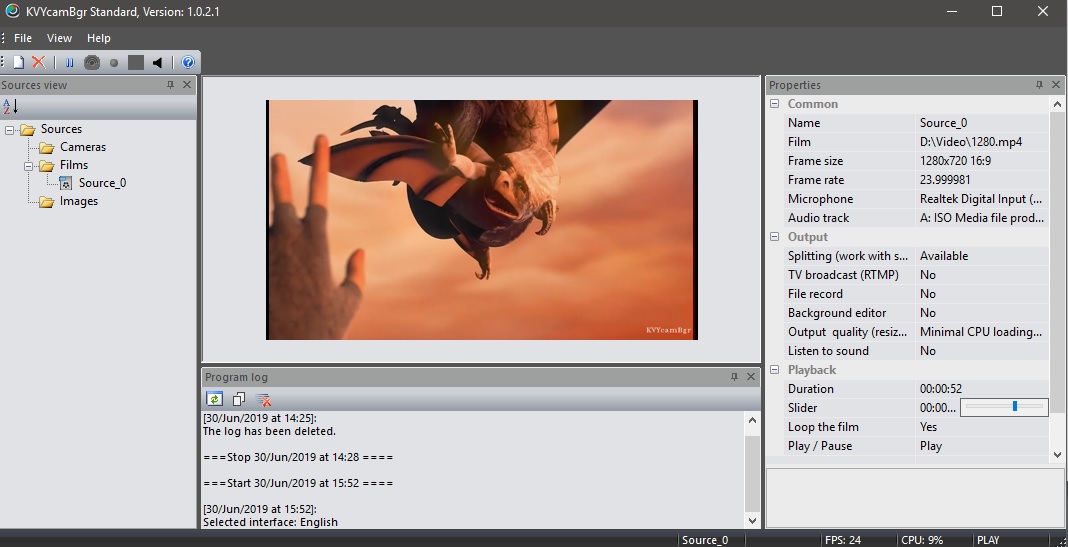
For example the window with a new film source:
Control panels:
-
- Source view. The panel keeps all sources created by you. Here you can select any source and sort them by alphabet (icon of the panel’s toolbar). A context menu is available for the sources list of that panel. Using the menu commands you can create a source, delete it (or all sources), rename and open it for playing. Some of those commands you can find in the File menu or at the program’s toolbar
- Properties. The panel shows all properties of a currently played source. You can change some of those properties, but some of them are not editable. For example for a film source you can select another audio track (if it’s available for that film), but you cannot change a frame rate of that film. The program’s toolbar has also some commands from Properties, for example, the command Play/Pause. There are tooltips for each property which will help you to understand them better
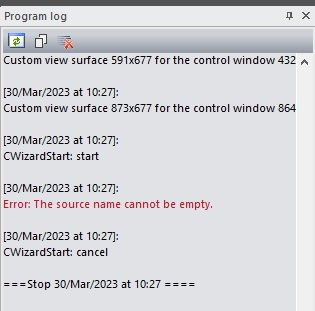
- Program log. Use this panel for diagnostics. KVYcamBgr writes all information about errors into this log. Please email it to us if you have problems with the program. The panel’s toolbar and its context menu have the commands for control of that information: Refresh log, Copy log to clipboard and Clear log. In the Studio version, the program marks errors in red in the log:
- Status bar. The panel shows a name of a currently played source, status of a broadcast channel or file recording, output frame rate, common CPU loading and status of the video stream. Tooltips are available
Menu commands:
- File/New source. Opens the wizard for creating a new source. The program’s toolbar and the context menu of Source view panel have the same command too.
- File/Delete source. The program’s toolbar and the context menu of Source view panel have the same command too.
- File/Reload current sourse. Restart of the source.
- File/Delete all sources. The context menu of Source view panel has the same command too.
-
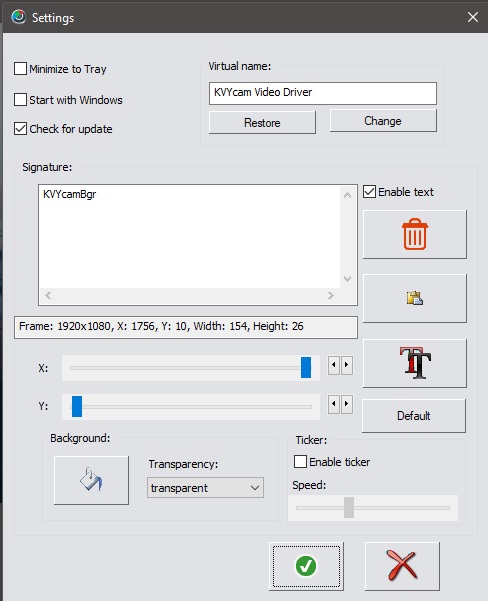
File/Settings. The command opens a window for setting common options:
- File/Reset all settings. The command deletes all video sources and sets all options by default, requires program restart. This command has an equivalent on the Command Prompt: KVYcamBgr -r. Use this command if the program launch fails.
- File/Exit. Close KVYcamBgr.
- View/Toolbars and panes. Shows/hides panels in the program.
- View/Status bar. Shows/hides this bar in the program.
- View/Languages. Sets a language of the interface: English, Russian, Germany, Portuguese, Ukrainian, Poland, Japanese, Spanish, Chinese simplified.
- View/Application color. Sets a color of the interface.
- Help/About KVYcamBgr. Shows information about the current version and useful links.
Layout
The program works in maximized mode by default but you can set any size of the window. Panels collapsing is also available. If in the Settings you set the option Minimize to Tray, then the program goes to system tray with a video control window:
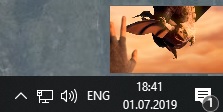
There is a context menu in System Tray for that mode. By using it you can restore the program to previous size, remove its control window or close the program at all.
Video zoom is available in the video area panel. You have to use the mouse wheel to zoom. For the Studio version you also can rotate and mirror frames at the output.
Splitting
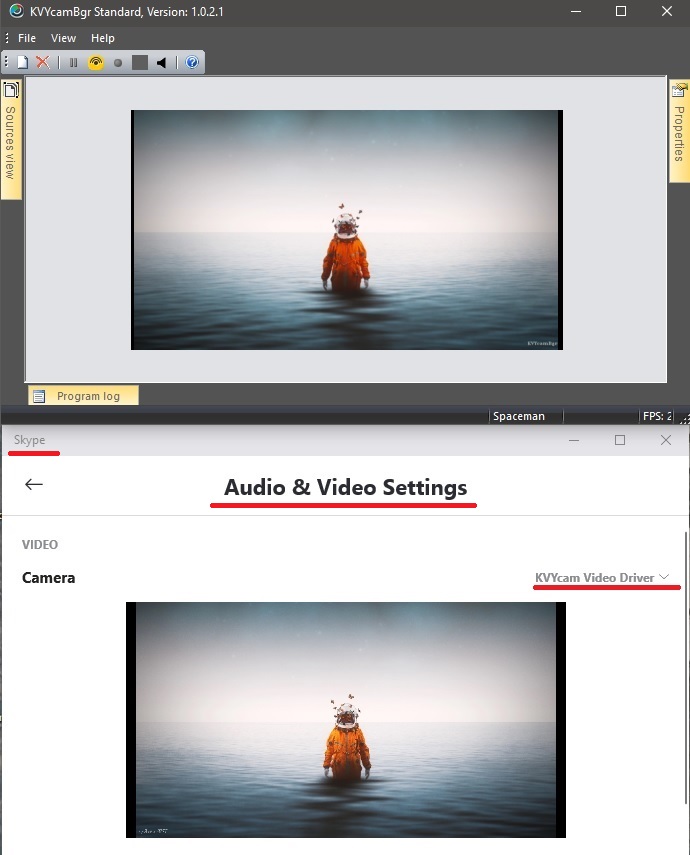
Works with several applications: Skype, Google+, Facebook, YouTube, Zoom and other video chats. In this mode KVYcamBgr connects to other applications via its own driver – KVYcam Video Driver. The application has to use it as a driver of web camera, having it specified in its settings.
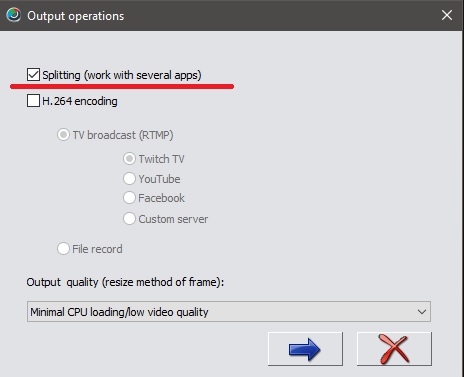
If you wish to use this mode, then you should create (the menu command – File/New source) a video source with the option Splitting:
Here is an example how to connect KVYcamBgr in Skype:
KVYcamBgr has also its own audio driver – KVYcam Virtual Audio Clip Driver. Use that driver if in KVYcamBgr you set a movie as a video source. Otherwise select an original audio source, for example, a microphone of your webcam.
If your OS is MS Windows 10, then you should learn this info.
For testing the program in splitting you can use the following test pages: Adobe Flash Player and HTML5.
TV broadcast (Live stream), file record and motion detection
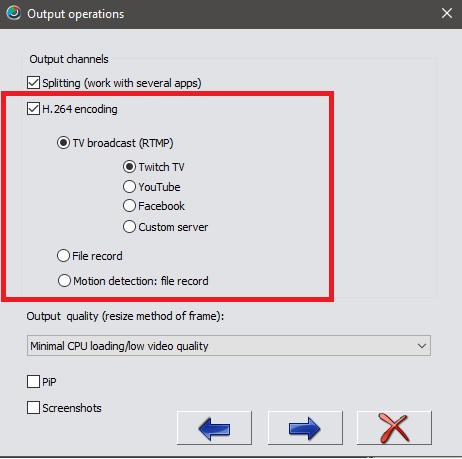
Send a video stream to TV servers (Twitch TV, Facebook, YouTube and custom servers), record video into a file or start a motion detector. These operations use H.264 encoder.
If you wish to use one of those operations you should create (the menu command – File/New source) a video source with the option H.264 encoding in the wizard:
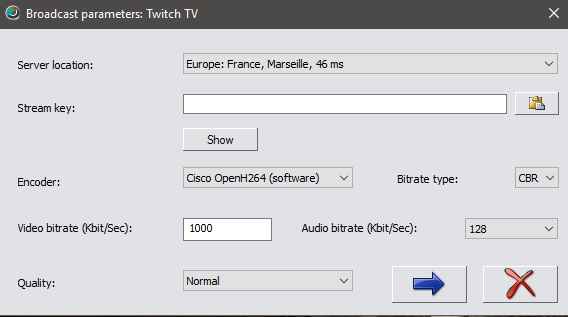
After it the wizard opens a window with the stream parameters.
For broadcasting:
Or for recording and motion detection:

After creating a video source you can correct those parameters in the source properties. You can start those operations from the properties too or via the program’s toolbar.
An example of broadcasting:
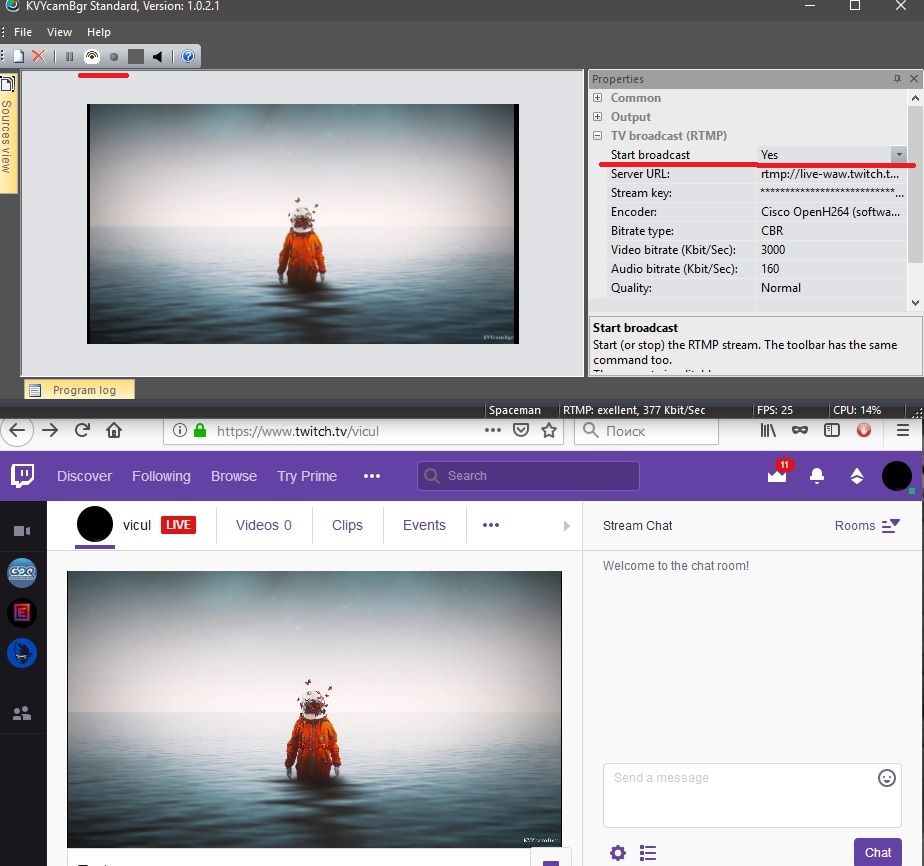
To control the stream use the program’s status bar.
The description of motion detection is here.
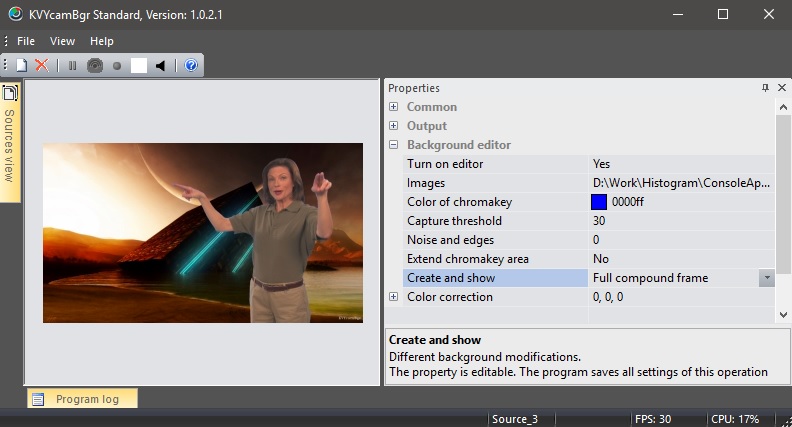
Background editor
This is an online replacement of background in video stream by using video sources: a webcam, movie, image or your desktop. The feature is optional.
For this feature you should have a chromakey: green, blue or red (though red color is not recommended).
If you wish to attach that editor, you should create (the menu command – File/New source) a video source with this feature in the wizard:
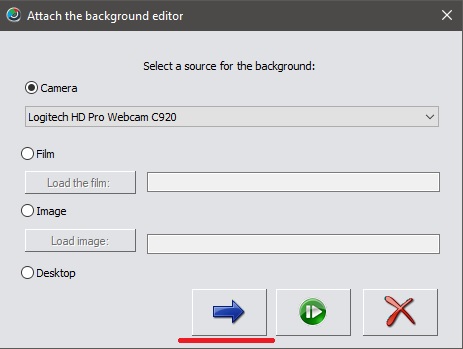
After creating a video source with the editor:
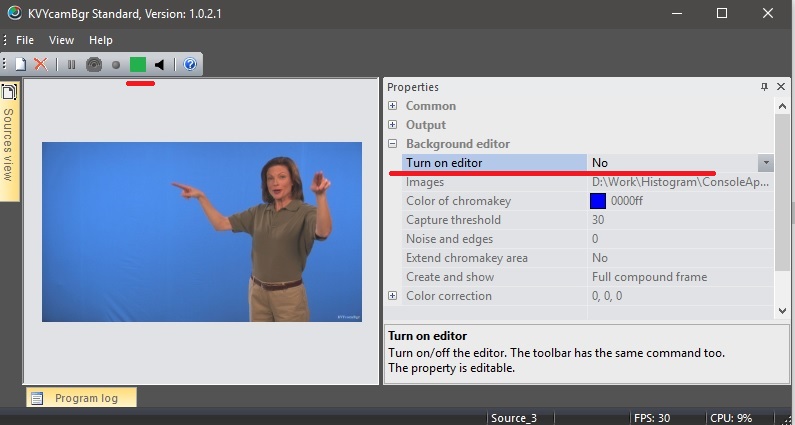
Start the editor from the properties panel too or via the program’s toolbar:
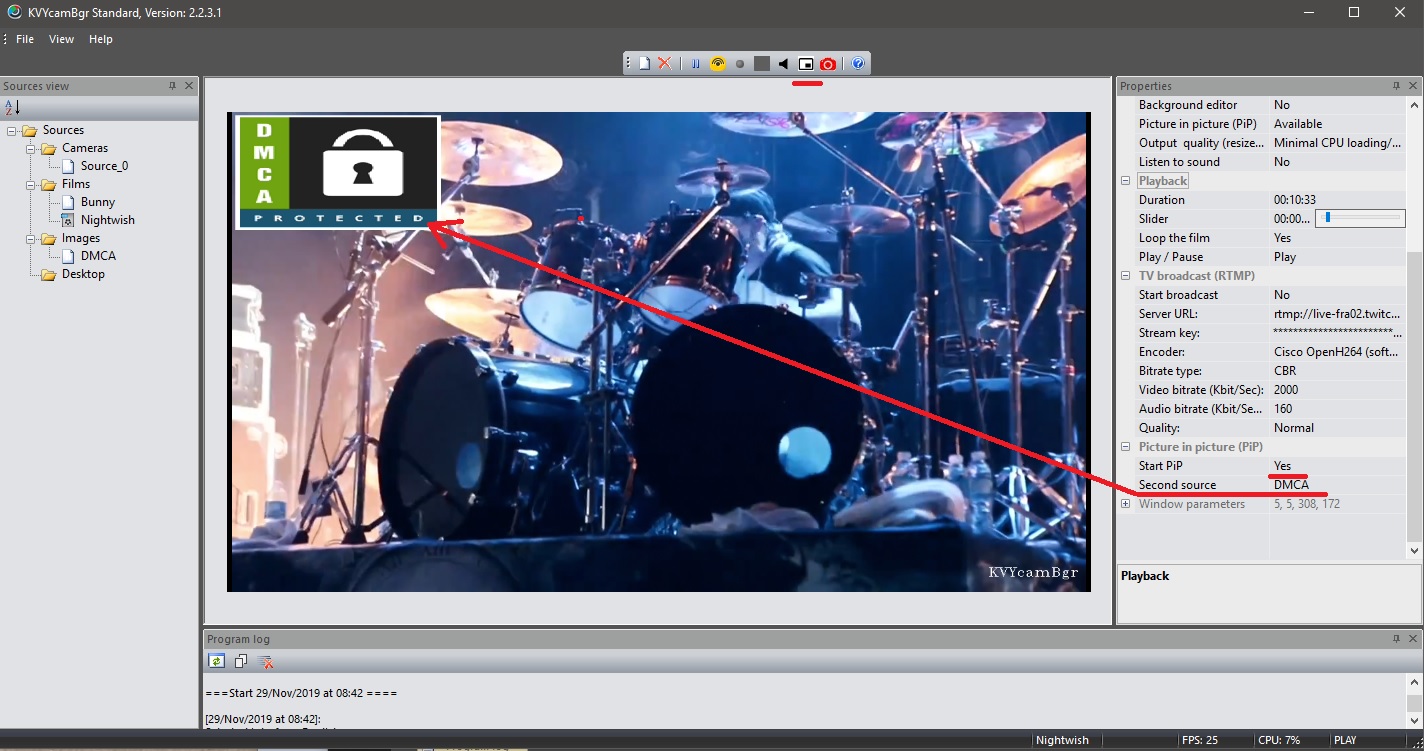
Picture in picture (PiP) modes
The program has two modes:
- PiP. In this mode the program inserts frames of one source into the frames of other. This mode is default.
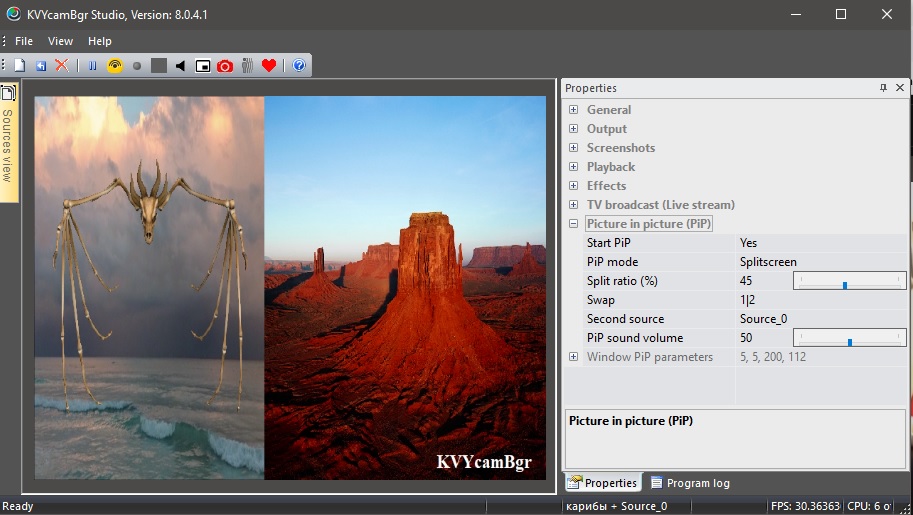
- Split screen. Here the program sets two sources into one frame. The mode is only for Studio versions.
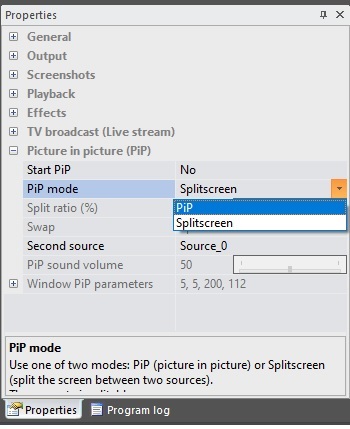
For these modes you should create two sources in the wizard (the menu command – File/New source). The first source (main) is created with the option PiP:
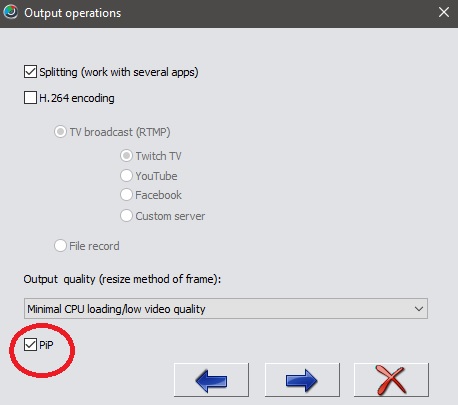
The PiP option is optional for the second source. For its run use the Start PiP property or the same command in the toolbar:
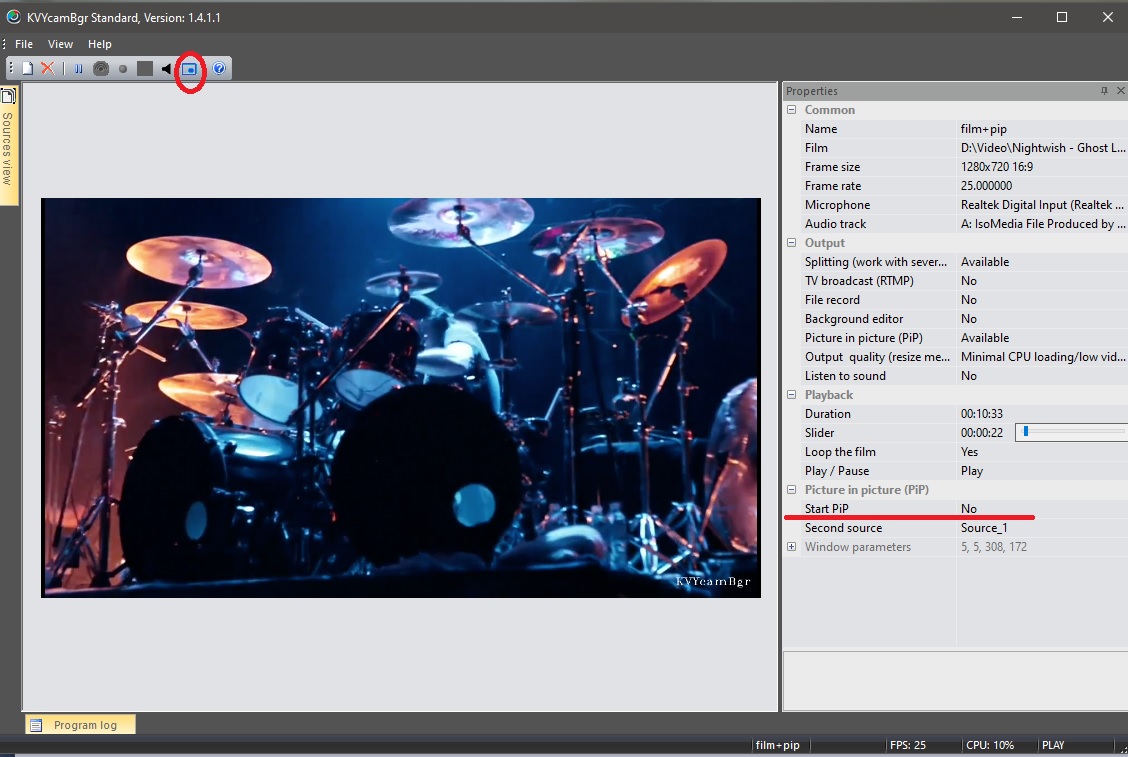
PiP mode:
Split screen mode:
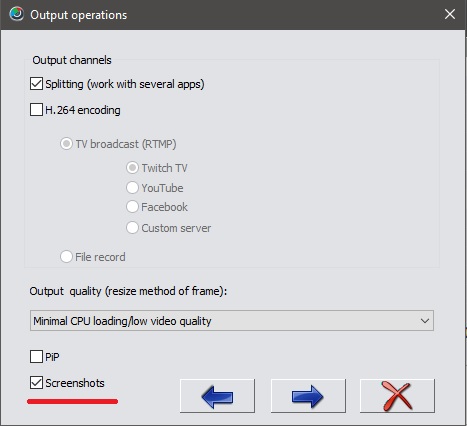
Screenshots creating
This feature is available only for KVYcamBgr Studio versions. To attach this function, you have to create a source with the screenshot option in the wizard (menu command – File / New source):
After creating the source:
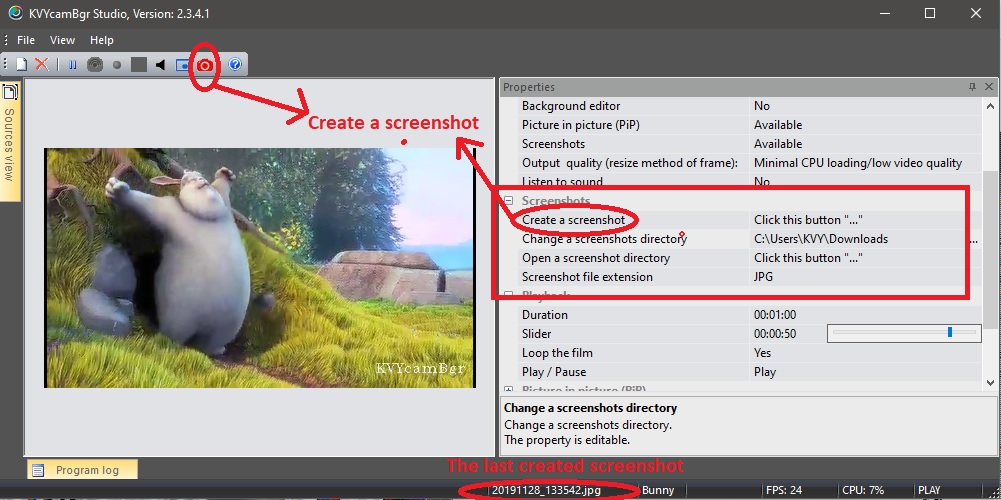
The created source will have the following screenshot properties:
– Create a screenshot – This property has the button ([…]) for this operation. You can use the button on the toolbar too.
– Change a screenshot directory – With this button ([…]) you can change the directory in which the program creates screenshots. By default is Download.
– Open a screenshot directory – The button ([…]) opens the directory in which the program created screenshots.
– Screenshot file extension – The format of screenshot. You can set BMP, JPG, PNG or TIFF. By default is JPG.
After creating a screenshot, the program displays the file in the Status bar for several seconds.
Banner control
This feature is available only for Standard versions.
After program start you can see the banner in the high part of the video window:
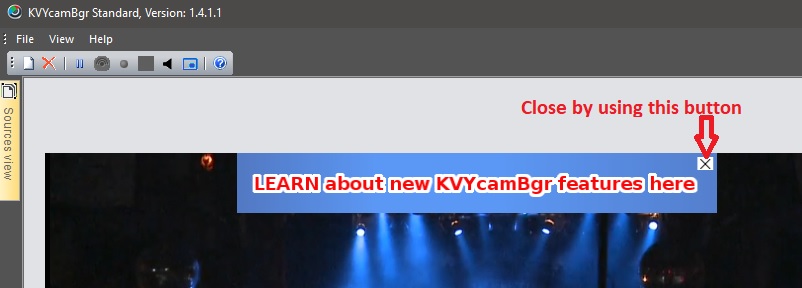
That banner will show the information about new program features, some solutions for KVYcamBgr and sponsors info. If you wish to know about this info more, double-click on it by mouse.
The banner appears only in the video window. KVYcamBgr doesn’t send it to the connected programs and TV servers.
You can remove the banner by using the [x] button.
Command Prompt
It has the following commands:
– KVYcamBgr.exe /?
Shows a list of all commands.
– KVYcamBgr.exe -r
Deletes all video sources and sets all options by default, requires program restart. This command has an equivalent on the Menu command File/Reset all settings. Use this command if the program launch fails.
– KVYcamBgr.exe -d
Repairs the KVYcamBgr database. This is an alternative to the “-r” command. The command restores all entries to default, but you will have to edit them manually after restarting KVYcamBgr. We also recommend that you use the “Available/No” feature of the “Output” property to correctly restore the output channels in your sources.